How-To Basics of getting started with Organic Gardening.
No matter whether you are an experienced organic gardener or you have simply decided that you would like to become more self-reliant by growing some of your own food, planting a garden requires planning. A properly planned and planted organic garden will naturally resist disease, deter pests, and be healthy and productive. With the spring planting season fast approaching, winter is the ideal time to get started.
Set Goals
What do you want to do with your plot of earth this season? Begin planning by setting goals. Grab your garden map, a pencil, your gardening guide, catalogs, and your thinking cap. List the areas of your yard and garden separately (i.e. lawn, vegetable patch, flower garden), and, keeping in mind the size and conditions of your site, brainstorm! Are you planning a garden for the first time? Do you want to expand your existing garden? Did you have pest or disease problems last year that you're hoping to prevent this year? What map? To create a map of your yard or garden, measure the dimensions of your site as a whole, and then the individual dimensions of your vegetable patch, flowerbeds, and lawn. It's easiest to draw your map to scale on a sheet of graph paper. These measurements will be necessary later, when you are determining how much of a plant or seeds to buy. Once the map is drawn, write in any information you know about soil characteristics, drainage, environmental conditions (sunny, shady, windy), and the names of trees and perennial plants that already exist. Your map will let you know exactly what you have to work with, and will give you a realistic idea of problems that need attention or features you'd like to change or add.
Gardening 101
It is important to understand the magnitude of your project before you begin. Getting the background information necessary to fulfill your goals may take an hour or a week, depending upon your level of experience and how involved you plan to get. Consulting your garden guidebook is a great way to begin - I suggest Warren Schultz's The Organic Suburbanite, The New Organic Grower by Eliot Coleman, Rodale's Chemical-Free Yard & Garden, or The Handy Garden Answer Book by Karen Troshynski-Thomas. You can also go to your local library and investigate their resources or contact your local garden club for their suggestions. As you research, write down how long each project will take, what tools you will need, and the approximate cost of everything you will need. This information will be invaluable when you make up your shopping list and schedule of activities. Scheduling and Organization. A schedule of activities lists what you hope to accomplish in what time frame. It will help keep you on track. It is important to be realistic about what you are capable of.
This is not a project that can be taken on alone in a week. Staggering your major tasks over time will make them easier to accomplish and save you the ultimate frustration of unfinished projects. Planning for the long term will aid in your organization. You can create a year-by-year schedule that maps out a time frame in which to achieve your big goals. Obviously, the schedule can change as time goes by, you learn new methods and you rethink your objectives, but maintaining focus on what you hope to create in the long term can keep you motivated on what you are doing now.
Tool Tutorial
You have a plan! You have knowledge! Do you have tools? Chances are you may be able to obtain most tools at your local lawn and garden store. Bring the list that you assembled in Gardening 101, and, if you are a seasoned gardener, assume that the same pests and plagues will be back that you dealt with last year and buy your supplies now. If you are new to the gardening scene, buy the basic tools that you will need, and then nose around the neighborhood and perhaps your local gardening club to see what is recommended for what you are planting and where you live.
Basic Tools:
Diggers - You will need a spading fork for aerating your soil and turning your compost pile. Look for a spading fork with rectangular, flat blades. A manure fork may also be compost-pile friendly when it comes to turning.
Weeders - Weeding tools include hoes and short-handled cultivating tools. Both are made in a variety of styles, and you will probably want more than one of each.
Hoe
hoe types include:
Swan-neck hoe - The curved neck positions the cutting blade to skim just below the surface, making it ideal for light work around garden crops.
Oscillating hoe - Also called a scuffle hoe or hula, it has a hinged, double-edged blade that barely disturbs the soil surface, minimizing the number of new weeds brought to the surface.
Collinear hoe - Designed by Eliot Coleman, the narrow blade and angled handle are useful for cutting off small weeds with little soil disturbance.
Eye hoe - Also called a grub hoe, the heavy blade is for hard chopping at tough, overgrown weeds.
Standard short-handled cultivating tools:
Hand cultivator - A tined tool, useful for disturbing the soil surface around close planting to uproot young weeds.
Dandelion weeder - Made for uprooting weeds with long taproots.
Pavement weeder - A trowel for removing weeds in cracks of stone slab or brick walkways.
Pruners - Pruning trees and shrubs promotes growth and good health, and pruning out diseased wood helps to control disease problems. Pruning tools come in varying sizes depending on your need. Choose a sharp, high quality pruning tool.
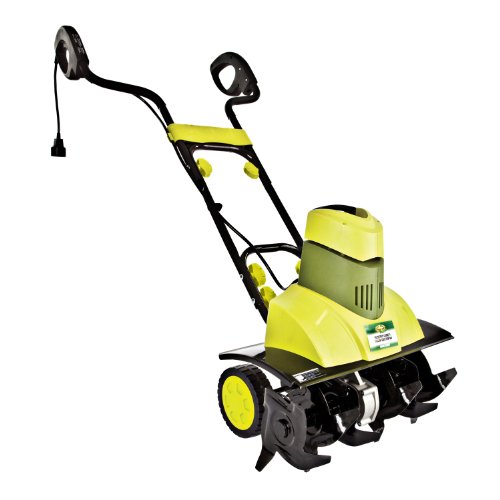
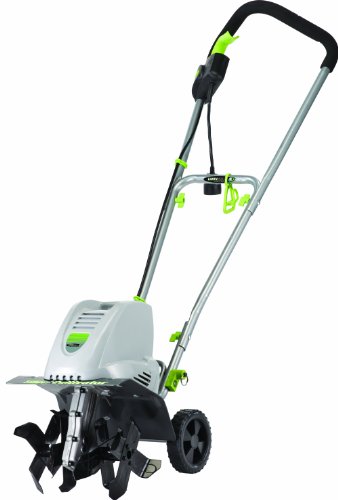
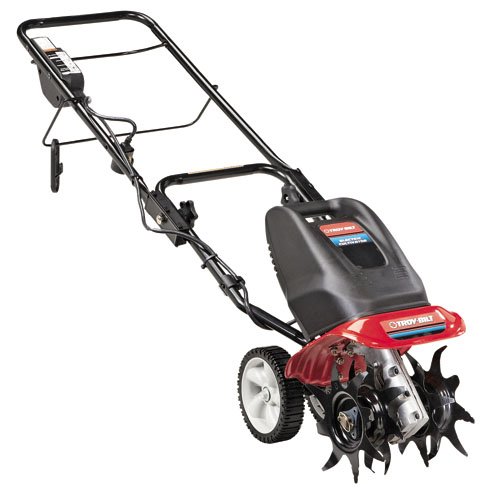
Tillers - Tillers will also range in size, depending on the job. There are large, gaspowered tillers for breaking ground or big jobs, and small tillers that are lightweight and are useful for cultivating around perennials. Rent a few tillers to try them out before buying, as they do differ a great deal and can be expensive.
Sowers - Wheeled seeding tools that have changeable interior disks for different seed sizes and spacings are available and very handy if you are planting large areas.
Comfort tools - There is a plethora of comfort- oriented garden accessories available on the market today. Products range from gloves, to knee pads, to small, wheeled benches/carts. It is up to you to decide what will suit your needs, if you need any at all..
Starting From Seed
Starting your plants from seed will ensure that they are chemical free. Most transplants sold in garden centers have been treated with chemical fertilizers or pesticides. Seeds themselves bought at garden centers may be coated in fungicides, so be very careful about what you buy or buy from an organic seed supplier. To start plants from seed, you need sterile soil, sterile planting containers, and labels. It is better to grow each seedling in a separate container to avoid the damage incurred by ripping roots apart, and to make for a less shocking transplant. If you purchase soil mix, be sure that it is sterile to avoid spreading disease to your seedlings.
To make your own mix, use vermiculite (a mica-based mineral that has been heated to make it expand to many times its original size), perlite (volcanic ash that has been heated and 'popped'), and sphagnum (moss that has been collected while still alive, dried, and then finely ground). Add 1 tablespoon of lime for each 2 quarts of sphagnum that you use to counteract its acidity. Good recipes for soil mix are 1 part sphagnum and 1 part vermiculite, or 1 part each sphagnum, vermiculite and perlite. Seeds actually need heat, not light, to germinate. The heat from a grow light or sunny window may be enough for some, but placing the containers on top of a warm refrigerator or on a seed-starting heating pad may be necessary.
Keep your seeds moist by planting them in moist mix and covering them with plastic wrap. As soon as you see the first sign of life, remove the wrap and place them someplace where they will receive 8-10 hours of sunlight per day.
Water them care fully with a spray mister, careful not to knock the seedlings over or wash away the soil. Before you transplant your seedlings outdoors, they need to be acclimated to the different climate. Bring them outside and place them in a sheltered, somewhat shady spot for a few hours each day, gradually increasing their exposure to the elements over a week or two. Plants have a hardiness zone, an area based on the average annual low temperatures where a plant is most likely to withstand the region's annual low temperature http://www.usna.usda.gov/Hardzone/ushzmap.html. The U.S. Department of Agriculture (USDA) has produced a map that breaks the U.S. into 11 zones. Growing plants that are outside your hardiness zone is not impossible, but they will need special attention. When deciding what to plant, consult a hardiness zone map to come up with plants that are most likely to thrive in your zone (see map).
Garden Design
Switching to chemical-free gardening will not only mean changing your gardening practices, but also your gardening design. Gardening in beds, as opposed to rows, provides for better weed, disease and pest management. Beds are also more attractive and easier to maintain. In a garden bed, everything is planted within arm's reach. The leaves of adjacent plants shade the soil, reducing weed growth. Diversity in a garden bed also has many advantages. A variety of plants in a mixed bed provide some natural pest protection by making it difficult for pests to find and eat their target plants, or helping to attract insects that are beneficial to your garden and prey on pest insects. It also reduces the chances that pests and disease organisms will build to epidemic levels, as they won't be able to hop from tasty host to tasty host, as they would if you had planted in rows. Your soil will also reap the benefits of your diverse planting techniques. A good example is planting nitrogen-gobbling corn with nitrogen-giving beans. Pairing up particular plants or planting in variety can help the soil maintain its nutrient balance, ensuring happier plants and a better crop yield. In fact, this technique even has a name - companion planting.
Companion Planting:
Much of the science of companion planting is figuring out what works for you. Many books can give you guidelines about what plants work well together. Some plants are attractants, some repellents, some can be inter-planted with your crops and flowers, and some compete too vigorously and should be planted in separate borders or hedgerows. For example, sunflowers are a good border plant, attracting lacewings and parasitic wasps; radishes are good to inter-plant because they repel the striped cucumber beetle; and marigolds are good to both use as a border and inter-plant, as they attract hover flies and repel root nematodes, Mexican bean beetles, aphids, and Colorado potato beetles. It can be confusing, and not all plants work well together. Your best bet is to start simple, determine what pests you encounter, and work from there, altering the plants in your garden bed as needed from year to year. Often, a mixture of flowers, vegetables and herbs work well together in a single bed.
For a good guide to the basics of companion planting, consult Rodale's Successful Organic Gardening: Companion Planting. Making your bed. Making your bed can be as simple as marking off 3-by-5-foot sections of garden with pathways left between them. However, to optimize the advantages of planting in garden beds, raise your beds. Raised beds provide lighter, deeper, more nutrient-rich, water absorbent soil. Raised beds, however, must be regarded as permanent in order to maintain their splendor. They cannot be walked on or broken down at the end of the season. You can build sides on your bed with bricks, rocks, or cedar 2-by-4 or 2-by-six planks to maintain the shape instead of raking and reshaping the bed every year.
Stay away from pressure-treated wood, as it is treated with wood preservatives that are harmful to you and the environment. How do you achieve raised beds? With double-digging, of course! (This is also known as hard work.)
Double-digging raised beds.
1. Dig out the top one-foot of soil along one end of the bed. Keep the soil in a wheelbarrow or on a groundcloth.
2. Loosen the exposed subsoil by thrusting in a spading fork and twisting its tines back and forth. For extra benefit, add a small amount of organic matter and work it in as you loosen that subsoil.
3. Once the subsoil is loosened, move over and begin removing the topsoil from the next strip of garden bed. This time, instead of keeping the topsoil that you are removing, shovel it over the subsoil to which you have just added the organic matter. You can add a little more organic matter to the topsoil as you shovel.
4. Repeat step 3.
5. When you have reached the last row of your garden bed, use the reserved topsoil to cover the last area of exposed subsoil.
6. Plant!
Composting
Compost is a great fertilizer and can aid in pest prevention. Compost is created when microorganisms, earthworms and nematodes consume and breakdown organic matter into simpler compounds. This process happens more quickly in an active compost pile because these microorganisms have the required heat, air and moisture, and a diverse supply of raw materials to digest. An active pile requires turning every week to add oxygen and keep the decomposition rate high; a passive pile is a pile of organic matter left to decay over time - usually in one to two years. Whichever method of composting you choose, the first step is making a compost pile. You can layer the materials in a heap, set up a heavy chicken wire frame (this works well for a passive pile), build wooden or concrete-block bins, or buy a commercially made bin to hold your pile.
Some commercial bins have built in rotating turners that will make your job much easier. The ideal size for an active compost pile is 4 feet by 4 feet, though size can vary. Choose a location that is shady and well drained for your pile. Clear away any surface cover at the site, loosen the soil with a spading fork, and put down a layer of wood chips or brush as a base. You can toss in garden or kitchen wastes, grass clippings, newspaper, manure, and sawdust. Avoid adding kitchen waste that is heavy in oil and meat products. Shredded materials make better compost more quickly. Try to alternate layers of plant material (chopped leaves or straw) with nitrogen-rich materials (kitchen scraps with manure and blood meal). Keep your pile moist, at a similar level to a squeezed-out sponge, and keep open piles covered with a tarp or heavy canvas so that they won't become waterlogged in the rain. If your pile becomes too dry, add water with kelp extract to moisten it and stimulate biotic activity.
Turn your active pile regularly, mixing and loosening the materials with a spading fork, to prevent overheating and keep microorganisms happy and active. Ideal active compost temperature should be within 140° to 150°, or at slightly higher temperatures if you are composting diseased plant material, around 160°. Your organic compost pile will yield rich humus that will be an ideal fertilizer to your garden. It will save you the money of buying commercial, synthetic fertilizers, many of which have shown to contain toxic waste. Healthy soil makes for hardy plants. Planning your garden can be the most important thing you do this growing season. With a solid plan in place and established
goals, you can minimize your pest problems and potential frustration, and maximize your growing season, and your garden's beauty. All this while saving on your grocery bill and increasing the quality of food you ingest by leaps and bounds. By planting an organic garden you will also be reducing your carbon footprint via producing some of your food (requiring no transportation or storage at the grocery store or packaging) thus contributing to our culture's sustainability in general. Check out Thrifty & Green for more articles on how you can save money and live green.
Suppliers:
* Seeds of Change, 888-762-7333, seedsofchange.com
* Gardener's Supply Company, 128 Intervale Road, Burlington, VT 05401, 888-833-1412, (fax) 800-551-6712, gardeners.com
* Harmony Farm Supply and Nursery, 3244 Highway 116 North, Sebastopol, CA 95472, 707-823-9125, harmonyfarm.com
* Peaceful Valley Farm Supply, P.O. Box 2209, Grass Valley, CA 95949, 888-784-1722, groworganic.com
* Gardeners Alive, 5100 Schenley Place, Lawrenceburg, IN 47025, 812-537-8650, gardensalive.com
Resources:
* Bradley, Fern M., ed. Chemical-Free Yard & Garden, Eamus: Rodale, 1991.
* Troshynski-Thomas, Karen, The Handy Garden Answer Book, Detroit: Visible Ink, 1999.
 | Price : $199.00


